
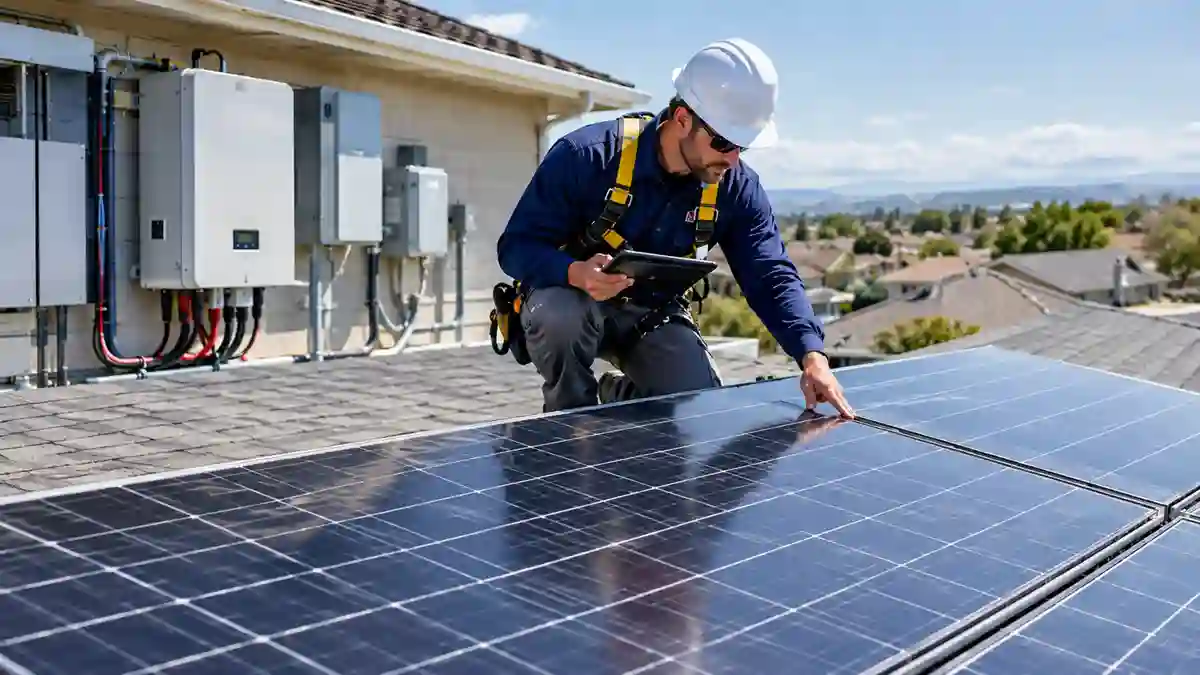
A practical solar panel repair guide covering common PV faults, inverter shutdowns, wiring, bypass diodes, batteries, repair costs, warranties, and replacement decisions.
A solar system can appear to be failing when the actual problem is much smaller. Solar panel repair is not always about replacing a damaged panel. A drop in production can also come from dirty modules, shading, wiring or connector problems, inverter protection shutdowns, communication failures, or even a faulty data logger or Wi-Fi connection.
As a solar engineer, I have seen cases where a system appeared to have a major equipment failure, but the actual issue was something much simpler to diagnose and correct. I have also encountered more serious problems, including bypass diode faults, damaged wiring, hot spots, and physical module damage that required proper technical assessment.
Editor’s Note: This guide focuses primarily on residential and small commercial photovoltaic systems. Repair costs are U.S. reference ranges unless otherwise stated and can vary significantly by location, system design, roof access, equipment brand, and warranty coverage.
How to Know Something Is Actually Wrong
A solar system can appear to be failing when the actual problem is much smaller.
Before assuming that a panel or inverter needs replacement, start with the system’s monitoring app or inverter display. A healthy photovoltaic system normally follows a recognizable production pattern: output rises after sunrise, reaches its highest levels around the strongest solar period, and declines toward sunset. Weather, shading, temperature, and seasonal changes can alter the curve, so the important thing is not one unusual day but a persistent change from the system’s normal behavior.
Look for signs such as:
- A sustained drop in total system production
- One string consistently producing less than comparable strings
- A panel or group of panels showing unusually low output
- An inverter displaying a recurring fault
- Repeated shutdowns during otherwise normal conditions
- Monitoring data disappearing or becoming intermittent
- Visible cracks, discoloration, delamination, or other physical damage
- Evidence of water intrusion around the roof or electrical equipment
A monitoring failure does not automatically mean the solar system has stopped producing power. Communication problems with Wi-Fi, cellular networks, gateways, or monitoring hardware can make a functioning system appear offline. However, loss of monitoring should still be investigated because it removes an important source of information about system performance.
Engineer’s Note: In field troubleshooting, I always separate the question of whether the solar power system is producing power from the question of whether the monitoring system is successfully reporting that power. They are not the same problem.
The 7 Most Common Solar Repair Problems
The exact failure pattern depends on the equipment, installation quality, climate, and age of the system. In my experience working with photovoltaic systems, the following seven categories cover many of the problems encountered during troubleshooting and service work.
1. Monitoring, Data Logger, Wi-Fi and Network Problems
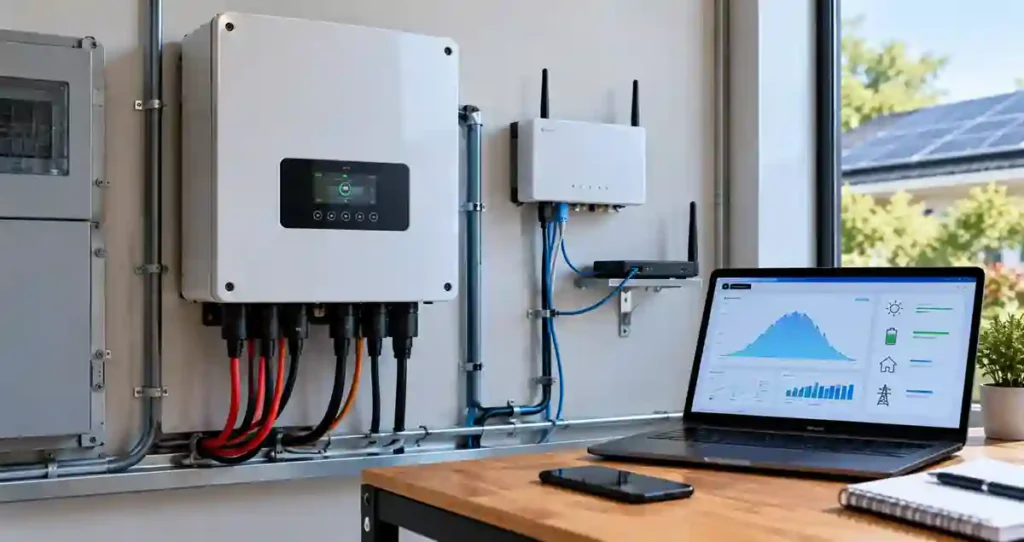
Sometimes the solar panels and inverter are working normally, but the monitoring platform has stopped communicating.
This is one of the problems I have encountered repeatedly in the field. A homeowner may report that the solar app shows no production, but after checking the inverter itself, the system may still be operating normally.
Common causes include:
- Data logger hanging or freezing
- Wi-Fi disconnection
- Router replacement or configuration changes
- Weak Wi-Fi signal at the inverter
- Internet or network outage
- Cellular communication problems
- Failed monitoring gateway
- Incorrect network credentials
- Communication cable problems
- Firmware or software issues
- Loss of power to communication equipment
A simple restart of a data logger or communication gateway can sometimes restore communication. However, if the problem repeatedly returns, the underlying network, hardware, configuration, or communication environment needs to be investigated.
Engineer’s Field Note: I have seen situations where a data logger or Wi-Fi connection hangs while the inverter continues producing electricity. The owner sees a flat production graph and assumes the solar system has stopped. The actual problem is the communication layer.
A useful first diagnostic question is therefore:
Is the system not producing, or is it simply not reporting?
That distinction can prevent an unnecessary service call or equipment replacement.
2. Inverter Problems, Overload and Protection Shutdowns
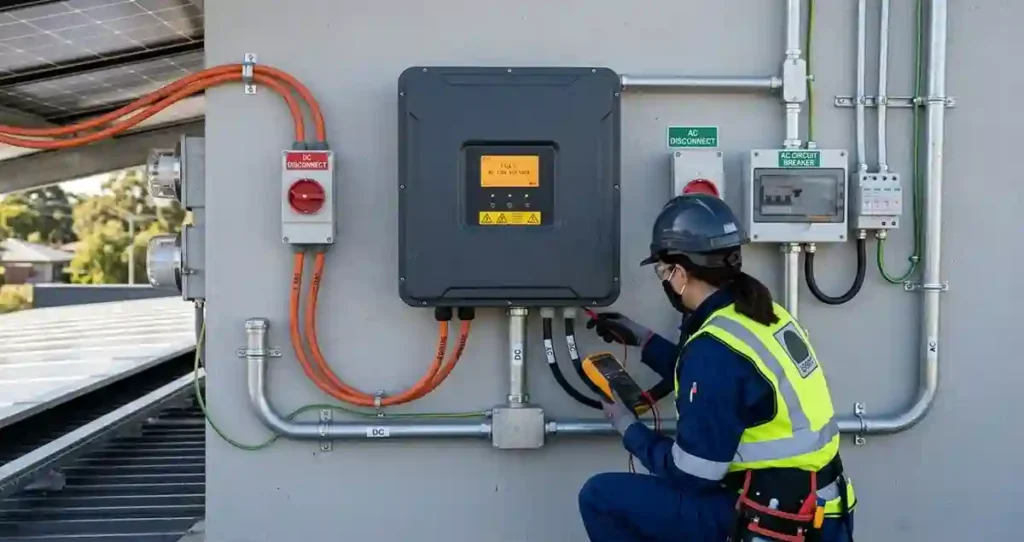
The inverter is a critical part of a grid-connected PV system because it converts DC electricity from the modules into usable AC electricity.
It is also one of the components that may require replacement before the solar modules. Inverter service life varies by technology, manufacturer, installation environment, operating conditions, and maintenance.
A failing or protective inverter shutdown may show:
- Fault or warning codes
- Repeated shutdowns
- No AC production
- Unexpected resets
- Communication failures
- Abnormally low system output
- Overload protection
- Short-circuit protection
- Grid-voltage protection
- Frequency protection
- Temperature-related shutdowns
- Insulation or ground-fault protection
Engineer’s Field Note: I have encountered systems where the owner assumed the inverter had failed because it repeatedly shut down. After checking the fault condition, the actual cause was protection activation rather than permanent inverter failure.
Modern inverters contain multiple protection functions. Depending on the equipment, a shutdown can be triggered by an AC overload, DC overcurrent, short circuit, abnormal grid voltage or frequency, excessive temperature, insulation problems, or other electrical conditions.
The important point is that a shutdown does not automatically mean the inverter is defective.
If an inverter detects a potentially dangerous electrical condition, shutting down may be exactly what it was designed to do.
The technician should identify the actual fault code and determine whether the condition is:
- Temporary
- Repeating
- Grid-related
- Caused by the PV array
- Caused by wiring
- Caused by excessive loading
- Caused by temperature
- Internal to the inverter
Repeatedly resetting an inverter without identifying the underlying fault is not a proper repair strategy.
Engineer’s Note: Before deciding that an inverter needs replacement, I want to know why it shut down. The protection event itself can provide an important clue about the real problem.
3. Solar Panel Problems: Dirt, Shading and Bypass Diode Faults
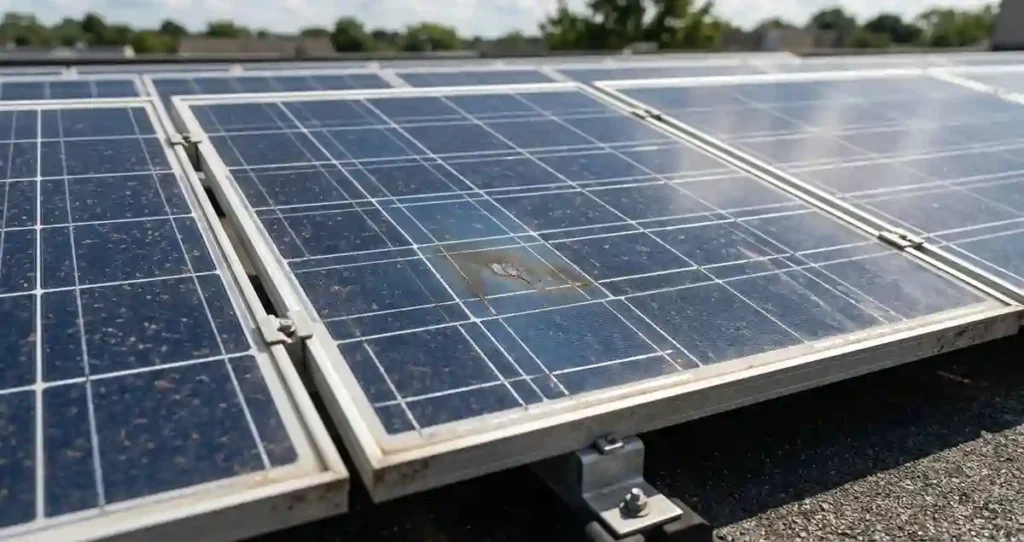
A solar panel can underperform without having obvious physical damage.
One of the simplest causes is also one of the easiest to overlook: soiling.
Dust, mud, bird droppings, pollen and other deposits can reduce the sunlight reaching the cells. In dusty environments, accumulated dirt can become a noticeable source of production loss.
Shading is another common cause. Trees grow, buildings are constructed, neighboring structures change, and objects that did not shade an array when it was installed may affect it several years later.
However, a panel that looks normal from the outside can also have an electrical problem.
One issue I pay particular attention to is bypass diode failure.
Bypass diodes are installed within PV modules to provide an alternative current path around affected cell sections under certain shading or fault conditions. A failed diode can create abnormal module behavior and reduce the output of the affected module or string.
Possible panel-level problems include:
- Heavy dust accumulation
- Bird droppings
- New or growing shade
- Cracked glass
- Cell damage
- Hot spots
- Delamination
- Junction-box problems
- Bypass diode failure
- Connector damage
- Internal electrical faults
Engineer’s Field Note: In my experience, a “bad panel” diagnosis should not be based only on appearance. A dirty panel may simply need proper cleaning, while a clean-looking panel can have an internal electrical problem.
Depending on the system architecture, diagnosis may require comparison of string voltage and current, module-level monitoring, electrical measurements, or thermal imaging.
A panel that consistently underperforms should therefore be investigated systematically rather than immediately replaced.
4. Wiring, Connectors and Protection Devices
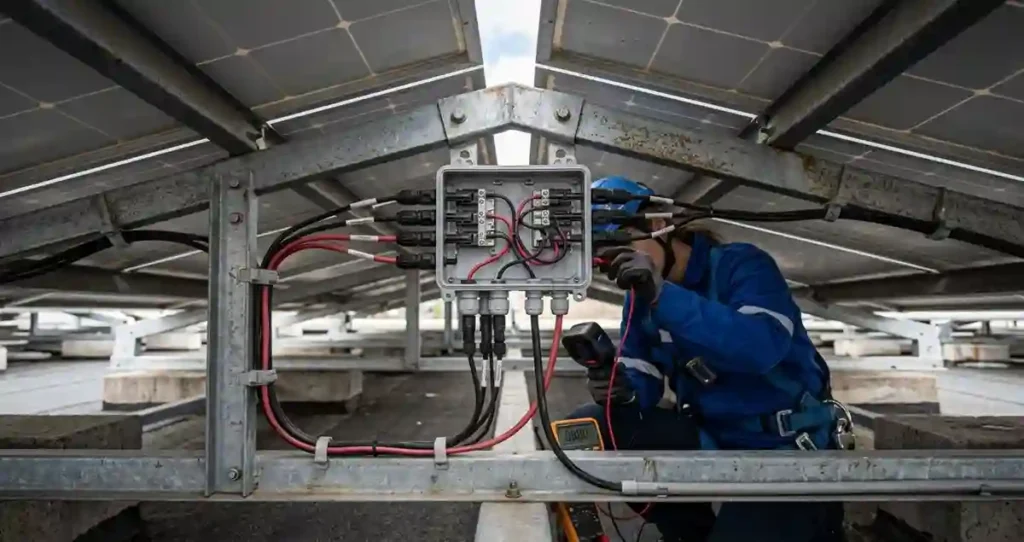
Electrical faults can be difficult to identify because the panels themselves may look completely normal.
Common causes include:
- Loose electrical connections
- Damaged cable insulation
- Rodent or animal damage
- Corrosion
- Junction-box problems
- Connector problems
- Damaged conduit
- Faulty fuses
- DC isolator problems
- AC breaker problems
- Combiner-box faults
- Grounding or earthing problems
A wiring problem can cause a complete string outage or a less obvious intermittent reduction in production.
Engineer’s Field Note: When troubleshooting a string that has suddenly stopped producing, I do not immediately blame the modules. The complete electrical path has to be considered, from the module and connectors through the string wiring, protection devices and inverter.
A poor electrical connection can also create localized heating. Thermal inspection may help identify abnormal temperatures that are difficult to see during a visual inspection.
Because PV circuits can contain hazardous DC voltage whenever sufficient sunlight is available, homeowners should not attempt to disconnect PV connectors or open energized electrical equipment themselves.
5. Roof Leaks, Mounting and Water-Ingress Problems
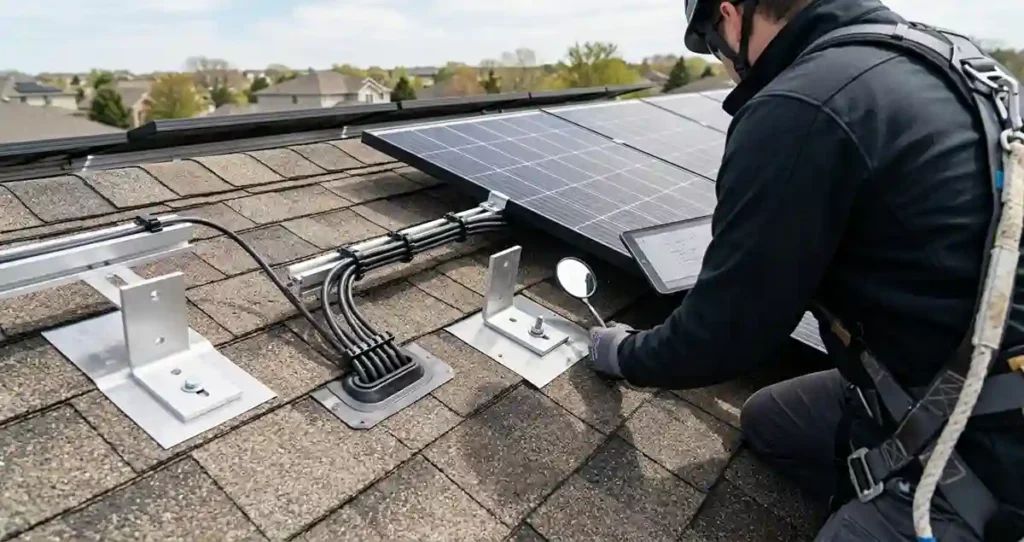
A roof leak is not necessarily a solar panel failure, but it can become a solar service issue.
Possible causes include:
- Improperly installed roof penetrations
- Failed flashing
- Damaged roofing materials
- Incorrect mounting hardware
- Aging sealants
- Movement or deterioration around attachment points
- Poor cable management
- Water entering electrical enclosures
Engineer’s Field Note: Solar troubleshooting does not end with the electrical equipment. I have encountered situations where the solar system itself was operating correctly while the homeowner’s actual problem was related to the roof or mounting structure.
A roof leak should not automatically be blamed on the solar installation. The source needs to be identified first.
The important questions are:
- Where is the water actually entering?
- Is the solar installation responsible for that entry point?
- Which contractor or warranty covers the repair?
Solar installers and roofers may also need to coordinate because repairing a roof beneath a PV array can require temporary module removal and subsequent reinstallation.
6. Physical Panel Damage, Hot Spots and Delamination
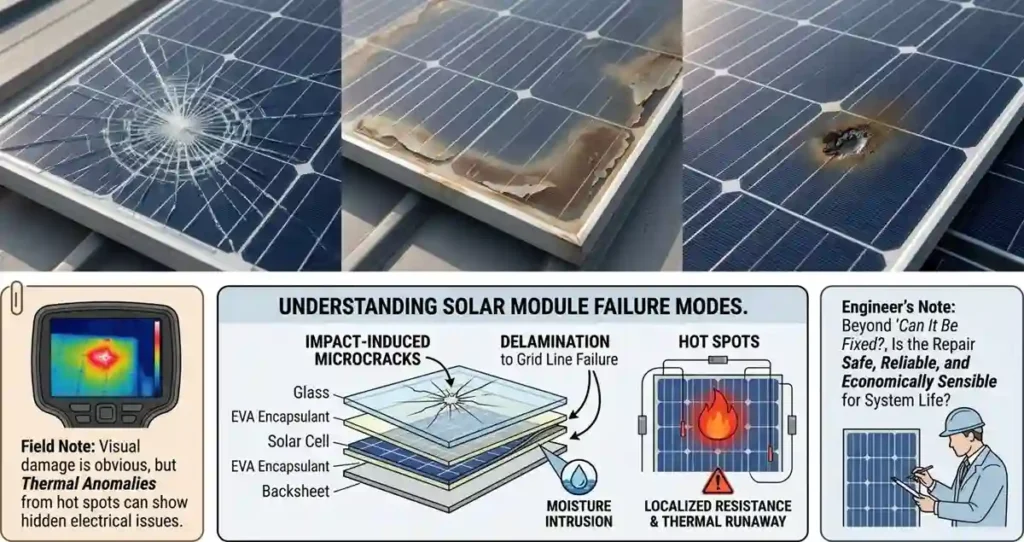
PV modules can be damaged by:
- Hail
- Falling branches or debris
- Severe weather
- Improper handling
- Impact
- Thermal stress
- Manufacturing defects
- Long-term moisture intrusion
Visible signs can include:
- Cracked glass
- Broken cells
- Discoloration
- Delamination
- Damaged frames
- Junction-box problems
- Burn marks
- Hot spots
- Backsheet deterioration
- Moisture intrusion
Engineer’s Field Note: Physical panel damage is usually easier to recognize than a communication or electrical problem, but the visible condition does not always tell the complete story.
A particularly important issue is the hot spot. A localized hot area can indicate abnormal current flow, cell damage, shading, or another module-level electrical problem. Thermal inspection can sometimes reveal a problem that is difficult to identify visually.
Delamination occurs when layers within a module begin separating. Depending on its location and severity, it can allow moisture penetration and affect long-term reliability.
A damaged module should not automatically be treated as a candidate for DIY repair. Significant glass cracking, cell damage, moisture intrusion, delamination, or electrical abnormalities generally require professional assessment and may lead to module replacement.
Engineer’s Note: My question is not simply, “Can we repair this panel?” The more important question is whether the repair will restore safe, reliable and economically sensible operation for the remaining life of the system.
7. Battery Storage: BMS Communication & Inverter Compatibility
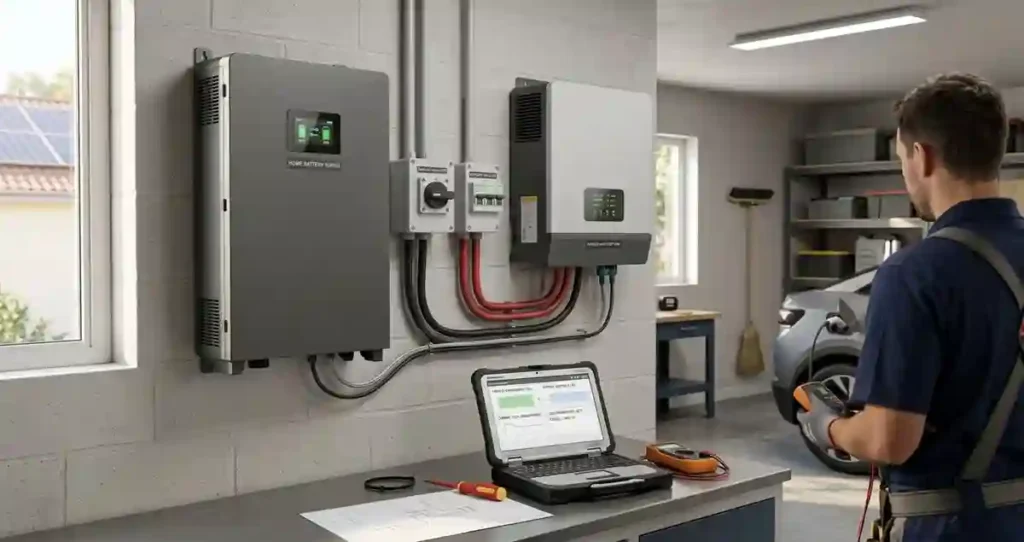
Adding a lithium battery and hybrid inverter introduces another layer of troubleshooting. The battery, Battery Management System (BMS), and inverter must communicate correctly for safe and efficient charging and discharging.
The BMS provides the inverter with information such as State of Charge (SOC), voltage, temperature, and charge/discharge limits. When communication fails, the system may stop charging, stop discharging, show an incorrect battery percentage, or report a battery fault even when the battery cells themselves are not damaged.
Common Battery & BMS Problems
- BMS-Inverter Compatibility: A battery and inverter may both support CAN or RS485 communication but still use different protocols or settings. If they cannot exchange the correct data, communication faults can occur.
- Firmware Issues: Different firmware versions can sometimes cause communication problems, incorrect SOC readings, or charging interruptions. Compatibility should be checked before updating either device.
- Communication Cable Problems: An RJ45 connector does not necessarily mean a standard Ethernet cable will work. Battery communication cables can use specific CAN or RS485 pinouts, and an incorrect cable can cause complete communication failure.
- Configuration Errors: Incorrect communication settings or DIP-switch positions can prevent the battery and inverter from communicating properly.
- BMS Protection Shutdown: The BMS may disconnect the battery because of over-voltage, under-voltage, excessive current, high or low temperature, or significant cell imbalance. To a homeowner, this can look like a dead battery, even though the BMS is actually protecting the battery.
Engineer’s Note: When a home battery suddenly stops charging or discharging, I would not assume the battery cells have failed. Checking BMS communication, cable connections, configuration, and inverter compatibility can identify a much simpler cause.
The Problems That Look Like Panel Failure
Engineer’s Field Note: One of the most important lessons from solar troubleshooting is that the component showing the symptom is not necessarily the component causing the problem.
| Symptom / Observation | Likely Causes | Diagnostic Check | Typical Action |
|---|---|---|---|
| Low system output | Dirt, shading, degradation, wiring fault, inverter issue | Compare actual vs. expected production; inspect array and inverter data | Clean, correct shading, test strings, or investigate inverter |
| One string producing less | Loose connector, damaged cable, bypass diode, module fault | Measure string voltage/current and compare with other strings | Inspect connectors/cables; test affected modules |
| One panel underperforming | Cell damage, hot spot, bypass diode fault, internal defect | I-V curve test, thermal imaging, module-level measurements | Repair where permitted or replace defective module |
| Hot spot visible on module | Cracked cell, shading, high-resistance connection, bypass diode issue | Infrared thermography under suitable operating conditions | Identify root cause and repair/replace affected component |
| Inverter shows DC/insulation fault | Damaged cable, connector, module, or moisture ingress | Insulation resistance and circuit isolation testing | Isolate faulty section and repair or replace damaged equipment |
| Intermittent power generation | Loose connection, connector fault, cable damage, thermal expansion | Visual inspection, connector testing, thermal imaging, electrical measurements | Repair connection or replace damaged component |
| Module voltage is abnormal | Bypass diode failure, internal module damage, open circuit | Measure module voltage and compare with expected values | Test diode/module and replace if necessary |
| Battery not charging | Incorrect settings, BMS issue, communication fault, wiring problem | Check battery status, BMS communication, voltage and inverter settings | Correct configuration or troubleshoot communication/wiring |
| Water or moisture inside junction box | Seal failure, damaged enclosure, cable entry problem | Visual inspection and electrical safety testing | Stop operation if unsafe; repair or replace according to manufacturer requirements |
| Visible cracks or damaged glass | Impact, thermal stress, mechanical damage | Visual inspection plus electrical safety testing | Follow manufacturer/warranty guidance; replacement may be required |
| Repeated inverter shutdowns | Grid issue, overheating, DC fault, configuration problem | Review inverter event logs and measure DC/AC conditions | Correct the underlying electrical, thermal, or configuration issue |
| Production gradually declining | Soiling, aging, degradation, shading growth | Compare historical production and test system performance | Clean/maintain system or investigate degradation and component faults |
This is why I prefer a diagnostic approach over immediately replacing equipment. The objective is to identify the failed component and the root cause, not simply replace the component associated with the symptom.
What Does Solar Panel Repair Cost?
Solar repair pricing varies considerably by region, roof accessibility, equipment type, diagnostic requirements, and whether replacement parts are covered by warranty.
For U.S. homeowners, 2026 cost references put overall solar panel repair in a broad range, with published estimates varying considerably by the type of work. These figures are market estimates rather than fixed industry prices.
| Repair or Service | Approximate U.S. Reference Range | Important Consideration |
|---|---|---|
| Diagnostic/service visit | $100–$250+ | May be credited toward repair |
| Wiring or connector repair | $100–$400+ | Depends on tracing and access |
| Rust or corrosion treatment | $150–$350+ | Extent of corrosion matters |
| Cracked/broken panel work | $120–$550+ | Replacement may be preferable |
| Single panel replacement | $200–$550+ in some cost guides | Roof access and equipment matching can increase total |
| String inverter replacement | $800–$2,500+ | Model, capacity, labor and electrical work affect price |
| Microinverter replacement | About $150–$350+ | Access beneath the module can add labor |
| Roof-related repair | Highly variable | Roofing and solar removal/reinstallation may both be required |
These numbers should be treated as budgeting references, not quotations. A difficult roof, older equipment, specialized replacement parts, electrical-code requirements, or the need to remove several modules can substantially increase the final invoice.
Repair or Replace: How I Make the Call
There is no universal repair-versus-replacement formula. I start with three questions:
- What exactly failed?
- Can the failed component be safely restored to reliable service?
- Does repairing it make economic sense compared with replacement?
Cracked Solar Panel Glass
A small surface chip is different from a module with extensive glass cracking, cell damage, moisture intrusion, or electrical abnormalities.
If the glass is significantly cracked, the safer approach is normally to have the module professionally assessed and determine whether replacement is required. A cosmetic-looking repair does not necessarily restore the module to its original environmental or electrical integrity.
If a thermal inspection shows a hot spot, or electrical testing identifies abnormal module behavior, replacement becomes a much stronger consideration.
Delamination
Delamination occurs when layers within a module begin separating.
Depending on its location and severity, it can allow moisture penetration and affect long-term reliability. Significant delamination should generally be evaluated as a module-replacement or warranty issue rather than treated as a simple surface repair.
Inverter Problems
For an inverter, the decision is usually based on:
- Age
- Warranty status
- Failure type
- Availability of replacement parts
- Repair cost
- Labor cost
- Expected remaining service life
- Availability and cost of a modern replacement
I would not use a fixed rule such as “replace every inverter after eight years.” Equipment varies considerably. Instead, compare the repair cost and expected reliability with the cost of replacement and the value of obtaining a new warranty.
Solar Panel Repair Starts With Diagnosis, Not Replacement
Engineer’s Note: In my experience, one of the biggest mistakes in solar repair is jumping directly from a symptom to a replacement recommendation.
A proper troubleshooting process should move from simple observations toward more detailed testing:
Monitoring → inverter status → fault code → visual inspection → electrical testing → thermal inspection where appropriate → root-cause identification → warranty check → repair or replacement decision.
For example, if an owner reports that one solar panel is underperforming, I would not immediately recommend replacing the panel. I would first consider whether the problem could be caused by:
- Soiling
- Shading
- Connector problems
- String configuration
- Bypass diode failure
- Wiring
- Module degradation
- Cell damage
- Hot spots
- Monitoring inaccuracies
Likewise, an inverter that has shut down should not automatically be classified as a failed inverter. The protection event may be evidence that the inverter is responding correctly to an external electrical condition.
That diagnostic mindset is particularly important for larger systems, where replacing equipment without identifying the root cause can simply allow the same problem to occur again.
Is Solar Panel Repair Covered by Warranty?
This is where homeowners need to slow down before paying a repair invoice.
A solar installation can involve several separate warranty categories.
Product Warranty
The panel manufacturer’s product warranty generally addresses defects in materials or manufacturing.
Modern panel product warranties vary considerably by manufacturer and model. Some newer products offer product warranties of 25 years or more, while warranty terms for older equipment can be shorter.
Performance Warranty
A performance warranty addresses how much power the module is expected to retain over time.
For example, a manufacturer may specify a maximum annual degradation rate and a minimum remaining power level at the end of the warranty period.
This is different from a warranty against physical damage.
Workmanship Warranty
The installer’s workmanship warranty concerns the quality of the installation itself.
Potential examples include:
- Improper mounting
- Installation-related wiring problems
- Roof penetration problems
- Installation defects
The length and scope vary substantially between installers and contracts.
Inverter Warranty
The inverter has its own manufacturer warranty, which is separate from the solar panel warranty.
This distinction matters because a homeowner may have a long panel performance warranty but a much shorter inverter warranty.
What About Labor?
Never assume that a manufacturer’s warranty automatically means the entire service visit is free.
Depending on the manufacturer’s terms, installer agreement, location, and warranty program, costs such as diagnostic labor, roof access, removal, shipping, or reinstallation may be treated differently.
Before authorizing paid work, check:
- Panel product warranty
- Panel performance warranty
- Inverter warranty
- Installer workmanship warranty
- Labor coverage
- Shipping provisions
- Transferability
- Exclusions for weather or physical damage
Field Notes: What I See Most on Service Calls
A Single Underperforming Panel May Be Shading
A panel that suddenly produces less power is not necessarily damaged.
Trees grow. New structures appear. Chimneys change. Neighboring buildings can create new shading that did not exist when the system was installed.
Compare the affected panel’s location and production pattern before assuming hardware failure.
Dirty Panels Can Reduce Production
Engineer’s Field Note: In dusty environments, I have seen soiling become an obvious factor in PV performance. Dust, mud and bird droppings can reduce the amount of sunlight reaching the cells.
Before diagnosing a hardware failure, check whether the affected modules are significantly dirtier than the rest of the array.
Cleaning should follow the manufacturer’s recommendations. Avoid pressure washing, abrasive cleaning methods, aggressive chemicals, or walking directly on modules.
Bypass Diode Faults Can Hide Inside a Normal-Looking Panel
A module can look perfectly normal while experiencing an internal electrical problem.
A failed bypass diode can affect part of the module’s electrical behavior and may contribute to reduced module or string output.
When module-level data or electrical measurements indicate an abnormal panel, the technician should consider internal module faults rather than relying only on visual inspection.
Rodent Damage Can Affect Wiring
Rodents can damage exposed cable insulation beneath PV arrays.
If a system develops intermittent faults, unexplained string failures, or visible cable damage, the wiring should be inspected rather than simply resetting the inverter.
Not Every Inverter Error Means a Dead Inverter
An inverter fault can be caused by conditions outside the inverter itself.
A technician should determine whether the fault is:
- Repeating
- Temporary
- Grid-related
- Wiring-related
- Temperature-related
- Communication-related
- Related to overload or short-circuit protection
- Internal to the inverter
Replacing an expensive inverter without establishing the actual failure mode can result in unnecessary cost.
Communication Failures Can Look Like Production Failures
If the monitoring app suddenly shows no data, check the inverter display or local system status before assuming the PV array has stopped operating.
Data loggers, Wi-Fi devices, gateways, routers and network connections can fail independently of the solar generation equipment.
Get a Second Opinion on Major Replacement Quotes
If a technician recommends replacing a large portion of the system, ask for a written diagnosis.
A useful service report should identify:
- The failed component
- Evidence of the failure
- Testing performed
- Whether the issue is covered by warranty
- Recommended repair
- Recommended replacement
- Expected cost
For a major repair, a second professional assessment can be worthwhile.
A Practical Solar Panel Repair Diagnostic Sequence
A good diagnostic process should move from simple observations to more detailed testing.
Step 1: Check Monitoring
Compare current production with the system’s historical pattern.
If monitoring has disappeared, determine whether the issue is production-related or simply a communication problem.
Step 2: Check the Inverter
Record any fault or warning code rather than relying on memory.
Look for repeated shutdowns, overload conditions, short-circuit protection, grid faults, temperature warnings, or other protection events.
Step 3: Check for External Causes
Look for:
- New shading
- Severe weather
- Grid interruptions
- Roof work
- Construction nearby
- Visible debris
- Heavy soiling
- Bird droppings
Step 4: Perform a Visual Inspection
A qualified technician can inspect:
- Modules
- Mounting hardware
- Wiring
- Connectors
- Junction boxes
- Protection devices
- Accessible electrical equipment
- Roof penetrations
Step 5: Perform Electrical Testing
Depending on the problem, professional testing may include:
- Voltage measurements
- Current measurements
- String testing
- Insulation testing
- Continuity testing where appropriate
- Module-level electrical diagnostics
- Protection-device testing
Step 6: Use Thermal Inspection Where Appropriate
Thermal imaging can help identify abnormal heating patterns, including potential hot spots, cell abnormalities, connector problems, or other localized electrical issues.
Step 7: Check Warranty Before Replacing Anything
Record the module serial number, inverter model, installation date, purchase documentation, and evidence of the problem.
Step 8: Identify the Root Cause
Do not stop at identifying the failed component.
For example, replacing a connector may restore production, but the technician should also determine why the connector failed.
Step 9: Compare Repair With Replacement
For older equipment, the cheapest immediate repair is not always the most sensible long-term solution.
Consider equipment age, warranty, replacement availability, expected remaining life, labor cost, and system compatibility.
Regulatory & Safety Standards for Solar Panel Repair
Solar PV repair involves DC electrical hazards, rooftop work, and equipment that may be subject to specific safety and certification requirements. Repairs should be performed by qualified personnel and follow manufacturer instructions and applicable local codes.
- IEC 61730: Covers the safety qualification of PV modules, including electrical shock, fire, and mechanical safety.
- NEC Article 690: In the U.S., covers key PV installation requirements including disconnects, wiring, grounding, and other safety provisions. The applicable NEC edition depends on the local jurisdiction.
- IEC 62446: Provides guidance for PV system documentation, inspection, testing, and commissioning.
- Safe isolation: Follow appropriate shutdown, isolation, lockout/tagout, and voltage-verification procedures before servicing PV equipment.
Cracked modules, damaged connectors, exposed wiring, or water-damaged junction boxes should not be treated as simple DIY repairs. The appropriate action depends on the damage, manufacturer requirements, system design, certification, warranty, and local regulations.
Common Questions About Solar Panel Repair
How do I know if my solar panel needs repair?
Look for persistent production losses, visible physical damage, recurring inverter faults, abnormal monitoring data, or electrical problems. A single low-production day is not enough to diagnose a failed panel because weather and shading can have significant effects.
Can a cracked solar panel be repaired instead of replaced?
Minor surface damage may sometimes be evaluated for repair, but significant glass cracking, cell damage, moisture intrusion, delamination, or electrical abnormalities generally require professional assessment and may lead to module replacement.
Can a dirty solar panel cause a large production loss?
Soiling can reduce solar energy reaching the cells and therefore reduce output. The effect depends on the type and amount of dirt, local weather, rainfall, panel tilt, and environmental conditions.
What causes a solar inverter to shut down?
An inverter may shut down because of overload, short-circuit protection, grid voltage or frequency problems, temperature, insulation faults, communication problems, or internal equipment faults. The specific fault code and operating conditions should be evaluated before assuming the inverter needs replacement.
Can a solar panel bypass diode fail?
Yes. A bypass diode is an electrical component inside a PV module and can fail. A diode problem may produce abnormal module or string behavior even when the outside of the panel appears normal.
Why does my solar app show no production?
The solar system may actually be operating while the monitoring system is offline. Check the inverter or local system display and investigate the data logger, Wi-Fi, router, gateway, cellular connection, or network before assuming that the PV system has stopped producing.
Is solar panel repair covered by warranty?
It depends on the cause of the problem and the specific warranty. Manufacturing defects may fall under the product warranty, degradation may fall under the performance warranty, and installation problems may fall under the workmanship warranty. Weather and accidental physical damage may instead involve insurance or an exclusion under the manufacturer’s warranty.
How much does solar panel repair cost?
U.S. 2026 cost references show a wide range. Minor wiring or connector work can be relatively inexpensive, while panel replacement, inverter replacement, difficult roof access, and major electrical work can cost considerably more. Many routine repairs cost hundreds of dollars, while unusual or extensive jobs can cost several thousand dollars.
Should I clean my solar panels myself?
Follow the manufacturer’s cleaning instructions. Avoid pressure washers, abrasive tools, harsh chemicals, and walking on the modules. If the array requires roof access, professional cleaning or maintenance is generally safer than climbing onto the roof yourself.
How long do solar panels last?
PV modules are generally long-life components. Actual service life depends on the equipment, environment, installation, operating conditions, and degradation rate. Many modern modules are designed for several decades of operation.
How often does a solar inverter need replacement?
There is no universal replacement date. String inverters commonly have shorter expected service lives than PV modules, while microinverters can have different service-life expectations. Actual life depends on the equipment, operating environment, installation, loading, and maintenance.
Why is my hybrid solar inverter displaying a BMS Communication Failure?
A BMS communication error occurs when the hybrid inverter and battery system fail to exchange telemetry data over the CAN or RS485 bus. Common root causes include using a standard Ethernet cable instead of the manufacturer’s specific pinout cable, mismatched CAN/RS485 baud rates, incorrect master/slave DIP switch positions, or unpatched/incompatible firmware following a software update on either device.
Can I run a solar lithium battery without active BMS communication?
Yes, most hybrid inverters can operate in “open-loop” mode using manual voltage-based cutoff and charge thresholds. However, maintaining closed-loop BMS communication is strongly recommended because it allows dynamic current scaling based on real-time cell temperatures and exact State of Charge (SOC) tracking, which maximizes pack longevity and safety.
The Bottom Line
Solar panel repair begins with diagnosis, not replacement.
A drop in production does not automatically mean that a panel has failed. The cause could be monitoring, a data logger, Wi-Fi or network communication, soiling, shading, a bypass diode, wiring, an inverter protection event, roof-related problems, or physical module damage.
The most useful first step is to establish what changed and whether the problem is isolated or system-wide.
From there, a qualified technician can determine whether the problem requires a simple correction, component repair, component replacement, or more extensive work.
The goal should always be to identify the root cause, not simply replace the component associated with the symptom.
Keep your monitoring data, invoices, equipment serial numbers, warranty documents, and commissioning records. Those records can make both diagnosis and warranty claims considerably easier.
Engineer’s Note: If your system predates modern monitoring or you are unsure what normal production looks like, ask your installer or service provider to establish a baseline during the next inspection. A documented baseline gives you something meaningful to compare against when system performance changes.
This article is for general educational information and does not replace an onsite inspection or electrical diagnosis by a qualified professional. Solar repair costs, safety requirements, warranty terms, and applicable regulations vary by manufacturer, installer, system design, and location. U.S. cost figures in this article are reference estimates for 2026 and are not quotations.
Related guides on SolarVisionAI.com
- Monocrystalline Solar Panels 2026: Still Worth It or Hype
- Polycrystalline Solar Panels: Worth Buying in 2026?
- Thin-film Solar Panels: When They Beat Silicon (2026)
- BIPV Solar Panels: Building-Integrated PV Complete Guide
- Portable Solar Panels: Engineer’s Buyer’s Guide 2026
- CPV Solar Panels: Concentrated Photovoltaic Explained
- Skin Solar Panel: What “Solar Skin” Actually Means
- Solar Fence Post Lights: Cap Sizes, Types & Install Guide
- Bifacial Solar Panels in 2026: How to Boost Energy Output
- Solar Charge Controller: The Complete Guide
- MC4 Connectors: Solar Safety & Installation Guide
- Solar Panel Types, Efficiency & Benefits
- Solar Water Pump Guide
- BESS — Battery Energy Storage System Guide
- Commercial Solar Panel Installation
- Solar Refrigerator & DC Fridge — Complete 2026 Guide
- Bifacial Solar Panel Albedo Effect Guide
- TOPCon: Why TOPCon Solar Panel is a Proven Smart Investment in 2026
- HJT: Why Heterojunction Is the Hot Climate Champion
- PERC: PERC Solar Panel: Still Relevant or Already Outdated?
- Perovskite: Perovskite Solar Panels: The 2026 Reality Check
- N-Type vs P-Type: N-Type vs P-Type Solar Panels: Honest Comparison
- ABC: ABC (all back contact) Solar Panel: Back Contact Technology Explained
- IBC: IBC Solar Panels: Interdigitated Back Contact Guide
- Tandem: Tandem Solar Panels: Are Stacked Cells Ready for Rooftops?