
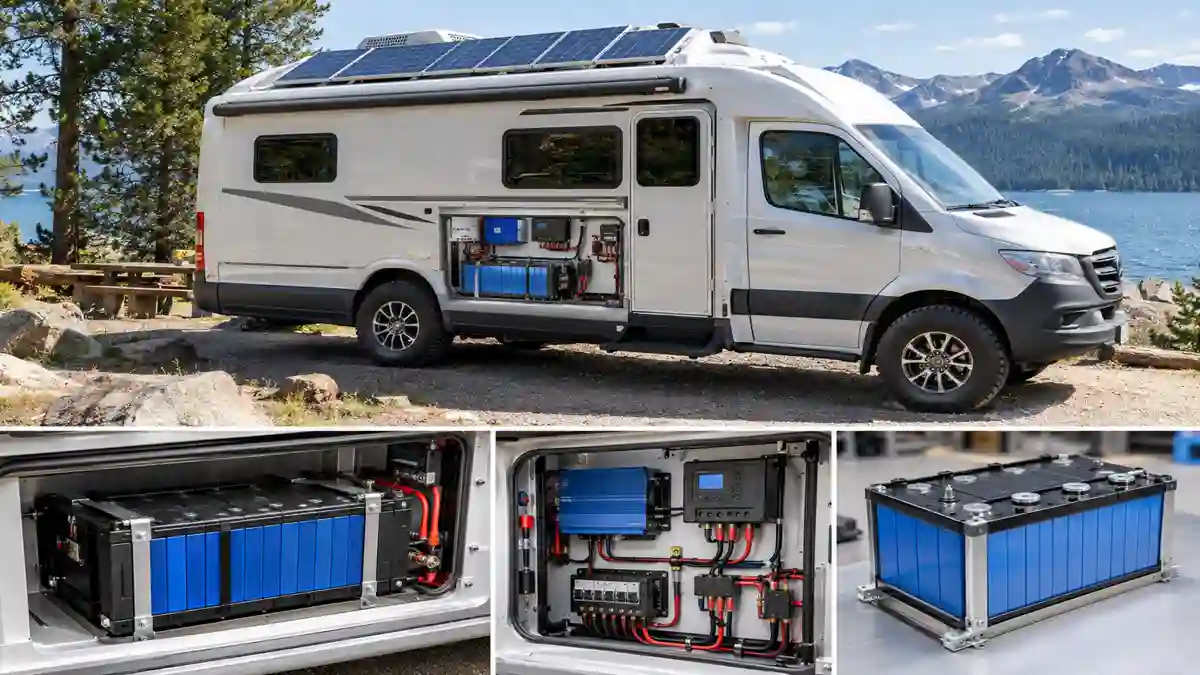
Best LiFePO4 battery for RV: how to size a 12V, 24V or 48V bank, charge it safely from solar or your alternator, and install it right.
As an engineer designing solar and battery systems, I regularly meet RVers who want the benefits of lithium power but feel overwhelmed by all the conflicting advice online. A LiFePO4 setup offers lighter weight, faster charging, and far more usable energy, but a successful install requires looking at the whole system. If your charger can’t reach the right voltage or your alternator pulls too much current, you won’t get the performance you paid for. This guide breaks down exact sizing formulas, cold-weather rules, and core wiring standards so you can set up your RV power bank correctly the first time.
Swapping lead-acid for lithium is the most common RV power upgrade, and one of the easiest to get wrong. The battery itself is straightforward. The trouble comes from what it is connected to: an older converter that cannot charge it properly, an alternator it can overload, wiring sized for smaller currents, and cold nights that block charging.
Quick answer: A LiFePO4 battery suits an RV because it weighs about half as much as lead-acid, gives 80 to 100% usable capacity, and lasts thousands of cycles. Size the bank by adding up your daily watt-hours, dividing by 12.8 V and by 0.9 for usable capacity, then adding a day of reserve. Most RVs need 100 to 300 Ah at 12 V. Before installing, check that your converter, alternator and solar controller can charge lithium safely, and add a Class T fuse and a battery monitor.
This guide covers sizing, charging sources, cold weather, installation and inverter loads, so you can plan the whole upgrade in one place. If you want the chemistry background first, see our LiFePO4 battery guide.
How to Choose a LiFePO4 Battery for RV Use
1. Why RV Owners Switch to LiFePO4
- Weight. A 12 V 100 Ah LiFePO4 battery weighs about 10 to 14 kg, versus roughly 27 to 32 kg for AGM. In an RV, weight limits cargo capacity.
- Usable capacity. LiFePO4 batteries can provide a much higher usable depth of discharge than lead-acid batteries. However, the recommended depth of discharge depends on the battery manufacturer’s specifications and the desired service life.
- Stable voltage. Appliances get near-constant voltage until the battery is nearly empty.
- Fast charging. Lithium accepts high current, so solar and alternator charging are more effective.
- Long life. Thousands of cycles instead of hundreds.
- No maintenance. No watering, no venting.
2. Sizing a LiFePO4 Battery for RV Loads
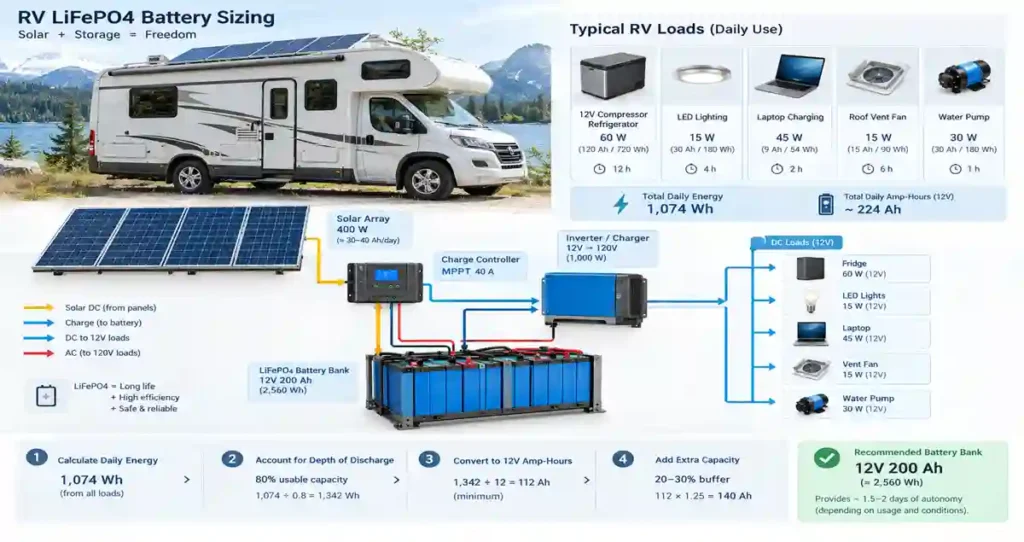
Start with a daily energy audit. Multiply each load’s watts by the hours it runs, and add them up. This example is for a couple boondocking with a 12 V compressor fridge:
| Load | Power | Hours (average) | Energy per day |
| 12 V compressor fridge | 60 W | 8 h (duty cycle) | 480 Wh |
| LED lighting | 20 W | 5 h | 100 Wh |
| Laptop and phone charging | 60 W | 4 h | 240 Wh |
| Roof vent fan | 15 W | 8 h | 120 Wh |
| Water pump | 60 W | 0.5 h | 30 Wh |
| Total | 970 Wh |
To convert to battery capacity, divide by 12.8 V, then by 0.9 for usable capacity. 970 Wh / 12.8 V = 76 Ah per day, and 76 / 0.9 = 84 Ah. One 100 Ah battery covers about one day. For two days without charging, choose about 200 Ah.
To recharge 970 Wh a day, divide by peak sun hours and by 0.75 for system losses. At 4 peak sun hours, 970 / (4 x 0.75) is about 323 W, so a 400 W solar array gives a comfortable margin. Our solar battery size calculator can run this for your own loads.
Engineering Note: Battery capacity should include some reserve for inverter losses, cloudy weather, temperature effects, and battery aging. The calculated capacity is therefore a starting point rather than an exact final battery size.
3. Suggested Battery Size by RV Use
| Use | Daily energy | 12.8 V bank | Solar (rough) |
| Weekend camping with frequent hookups | 500 to 800 Wh | 100 Ah | 200 to 300 W |
| Boondocking couple | 1,000 to 1,500 Wh | 200 Ah | 400 to 600 W |
| Full-time off-grid, some inverter use | 2,000 to 3,000 Wh | 300 to 400 Ah | 800 to 1,000 W |
| Roof air conditioning through an inverter | 5,000+ Wh | 24 V or 48 V, 5 kWh or more | Plus shore power or generator |
These are starting points. Use your own audit for a real answer.
4. How to Charge a LiFePO4 Battery for RV Systems Safely
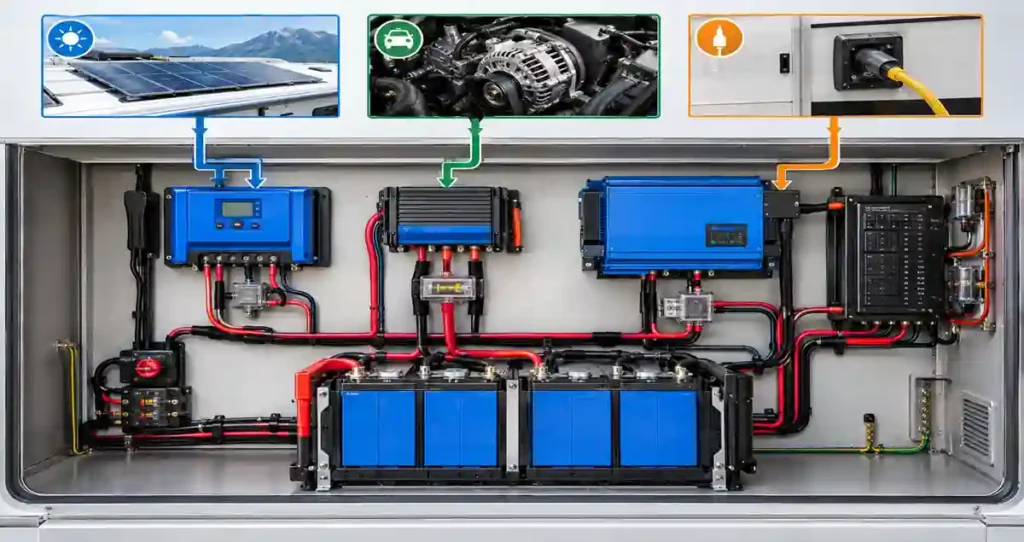
Shore power converter
Many RV converters were designed for lead-acid batteries. A converter that floats at 13.6 V may charge lithium slowly or incompletely, and one with an equalization mode can stress it. Check whether yours has a lithium setting, or replace it with a lithium-compatible converter or charger. Full voltage settings are in our LiFePO4 battery charger guide.
Alternator
Avoid connecting a LiFePO4 battery directly to the vehicle alternator unless the vehicle and battery manufacturer specifically approve the configuration. A low-resistance lithium battery can accept very high current, potentially overloading an alternator designed around a lead-acid charging system. A properly sized DC-DC charger provides controlled current and an appropriate charging profile.
Solar
Use an MPPT controller set to a lithium profile with equalization and temperature compensation off. See our lithium charge controller guide and, for mounting panels on the roof, our guide to RV solar panel mounting brackets.
Generator
A generator with a lithium-compatible charger or inverter/charger can top up on cloudy days. Make sure the charger current stays within the battery’s rating.
5. Cold Weather
LiFePO4 cannot be charged below 0°C (32°F) without damage. Discharge is possible down to about minus 20°C (minus 4°F). For winter camping, choose a battery with built-in heating, or mount the battery inside the heated living space. Many batteries include low-temperature charge protection that blocks charging in the cold, which is a safety feature, not a fault.
For winter storage, disconnect the battery at a partial charge (roughly 50 to 60%) and keep it out of freezing temperatures if you can.
Engineering Note: Always follow the battery manufacturer’s specified charging and discharge temperature limits rather than relying on a generic temperature threshold. Batteries with built-in heating and low-temperature charge protection can provide safer operation in cold-weather RV applications.
6. Installation Basics
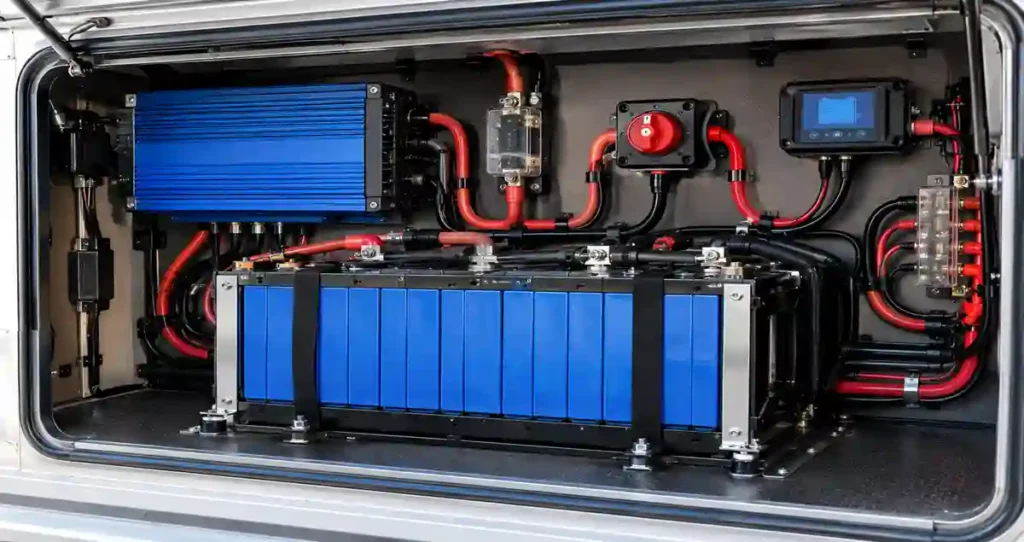
- Fuse it. Install a Class T fuse close to the battery positive terminal, ideally within about 7 inches (180 mm), following marine practice. Lithium can deliver very high fault current, and Class T fuses are rated to interrupt it.
- Size the cable for the current. A 2,000 W inverter on 12 V can draw 175 to 200 A. Use cable and lugs rated for it, and keep runs short.
- Minimize voltage drop. High-current inverter circuits can experience significant voltage drop if cables are too long or undersized. Keep high-current cable runs as short as practical and size the conductors according to the expected current, cable length and applicable electrical standards
- Add a shunt battery monitor. Voltage cannot tell you state of charge on LiFePO4, so a shunt gives an accurate reading.
- Fit a disconnect switch. It lets you isolate the battery for service and storage.
- Secure the battery. Vibration loosens terminals. Use brackets, lock washers and correct torque.
- Follow series and parallel limits. Use identical batteries, and only connect them in the way the manufacturer allows.
7. Running an Inverter and Roof Air Conditioner
12V vs. 24V vs. 48V for RVs
As inverter power increases, battery-side current also increases. A 24 V or 48 V architecture can substantially reduce DC current, cable size and voltage-drop concerns compared with a 12 V system. Larger RV electrical systems may therefore benefit from a higher-voltage battery architecture, particularly when running high-power loads such as air conditioning.
A 2,000 W inverter draws roughly 175 to 200 A from a 12 V battery, which exceeds the continuous rating of many 100 Ah batteries. In that case, use a 200 Ah battery or two in parallel so the load is shared.
A roof air conditioner typically draws about 1,300 to 1,800 W while running, with a much higher start-up surge unless it has a soft starter. Running one from batteries needs a larger bank and often a higher system voltage. Our guide to 12V vs 24V vs 48V LiFePO4 batteries explains when to move up, and our inverter size calculator helps size the inverter.
Engineer’s Note: Before buying an inverter, check its DC input current at full load. If that number is higher than the battery’s continuous discharge rating, the battery will trip its BMS at the worst moment, usually when the air conditioner compressor starts.
8. LiFePO4 RV Upgrade Checklist
- Do an energy audit and choose the bank size.
- Check the converter for a lithium profile, or replace it.
- Add a DC-DC charger if charging from the alternator.
- Set the solar controller to lithium and turn off equalization.
- Install a Class T fuse, correctly sized cable and a disconnect.
- Add a shunt-based battery monitor.
- Confirm cold-weather protection or a heated location.
- Confirm the inverter’s DC current is within the battery’s continuous rating.
Frequently Asked Questions
How big a LiFePO4 battery do I need for my RV?
Add up your daily watt-hours, divide by 12.8 V and by 0.9, then add reserve for cloudy days. Most RVs land between 100 and 300 Ah at 12 V.
Can I replace my lead-acid RV batteries with LiFePO4?
Yes, but check the converter, alternator and solar controller first, since all three may need a lithium setting or replacement.
Do I need a DC-DC charger for a lithium RV battery?
If you charge from the vehicle alternator, yes. It protects the alternator and gives the battery the correct charge profile.
Can LiFePO4 batteries be used in freezing weather?
They can discharge in the cold, but they cannot be charged below 0°C (32°F) unless they have heating. Keep them warm or choose a heated battery.
Is a LiFePO4 RV battery worth it?
For regular RV use, usually yes. Longer life, lower weight and more usable capacity make it cheaper per kWh delivered than lead-acid over the battery’s life.
How big a LiFePO4 battery do I need for my RV?
The common 100–300 Ah range is only a starting point; the correct battery capacity depends on your daily energy consumption, desired backup duration, charging sources and inverter loads.
Related Guides
- 24V 200Ah LiFePO4 Battery: Specs, Uses & Buying Guide
- LiFePO4 vs Lithium-Ion: Which Battery Should You Buy?
- LiFePO4 Battery: How It Works, Specs & Buying Guide
- LiFePO4 Batteries for Solar: How to Choose & Size Right
- 48V 200Ah LiFePO4 Battery: Specs, Sizing & Home Storage Guide
- LiFePO4 Battery Charger: Voltage, Amps & Settings
- Solar Panel Repair Guide: Diagnose Problems, Costs & Fixes
- IRS Form 5695 for 2025: Solar Tax Credit Guide
Related guides on SolarVisionAI.com
- Monocrystalline Solar Panels 2026: Still Worth It or Hype
- Polycrystalline Solar Panels: Worth Buying in 2026?
- Thin-film Solar Panels: When They Beat Silicon (2026)
- BIPV Solar Panels: Building-Integrated PV Complete Guide
- Portable Solar Panels: Engineer’s Buyer’s Guide 2026
- CPV Solar Panels: Concentrated Photovoltaic Explained
- Skin Solar Panel: What “Solar Skin” Actually Means
- Solar Fence Post Lights: Cap Sizes, Types & Install Guide
- Bifacial Solar Panels in 2026: How to Boost Energy Output
- Solar Charge Controller: The Complete Guide
- MC4 Connectors: Solar Safety & Installation Guide
- Solar Panel Types, Efficiency & Benefits
- Solar Water Pump Guide
- BESS — Battery Energy Storage System Guide
- Commercial Solar Panel Installation
- Solar Refrigerator & DC Fridge — Complete 2026 Guide
- Bifacial Solar Panel Albedo Effect Guide
- TOPCon: Why TOPCon Solar Panel is a Proven Smart Investment in 2026
- HJT: Why Heterojunction Is the Hot Climate Champion
- PERC: PERC Solar Panel: Still Relevant or Already Outdated?
- Perovskite: Perovskite Solar Panels: The 2026 Reality Check
- N-Type vs P-Type: N-Type vs P-Type Solar Panels: Honest Comparison
- ABC: ABC (all back contact) Solar Panel: Back Contact Technology Explained
- IBC: IBC Solar Panels: Interdigitated Back Contact Guide
- Tandem: Tandem Solar Panels: Are Stacked Cells Ready for Rooftops?